Following my previous articles discussing DNSimple for domains and DNS management and HTTPie to interact with APIs in the command line, today I am starting a post series on using DNSimple's API.
In this first part, we will see the necessary things to get started and do simple things such as listing your domains.
What do you need?
Access to the API is based on your account on dnsimple.com. So head over to the registration page and get your account setup.
Here are the other things you need to know for experimenting with the API:
The root endpoint for the API v2 is: https://api.dnsimple.com/v2/.
The documentation, where you will find information about the endpoints for the different operations you may want to do, is available here: https://developer.dnsimple.com/v2/.
When trying things, in particular for sensitive actions, you want to first test using the "Sandbox environment" provided on the "api.sandbox.dnsimple.com" domain. This testing mode requires a special account you can create on the dedicated signup page here: https://sandbox.dnsimple.com/signup.
For now, we will be looking at read-only operations, so let's see how to do that using the production environment of the API.
Authentication
There are two ways to authenticate through DNSimple API: the HTTP Basic Authentication way and the OAuth2 way.
With the HTTP Basic Authentication, your DNSimple account login and password are used to authenticate you as a user, and you could do...
$ http --auth EMAIL:PASSWORD https://api.dnsimple.com/v2/whoami
... to get a response.
Let's use the OAuth2 option, which is the recommended way. You need to create an access token for the account, in order to be granted access to all the resources linked to that account.
You can access the https://dnsimple.com/user page, and from there go to the page of the account you want to use (its URL is of the form https://dnsimple.com/a/12345/account if 12345 is the account identifier number).
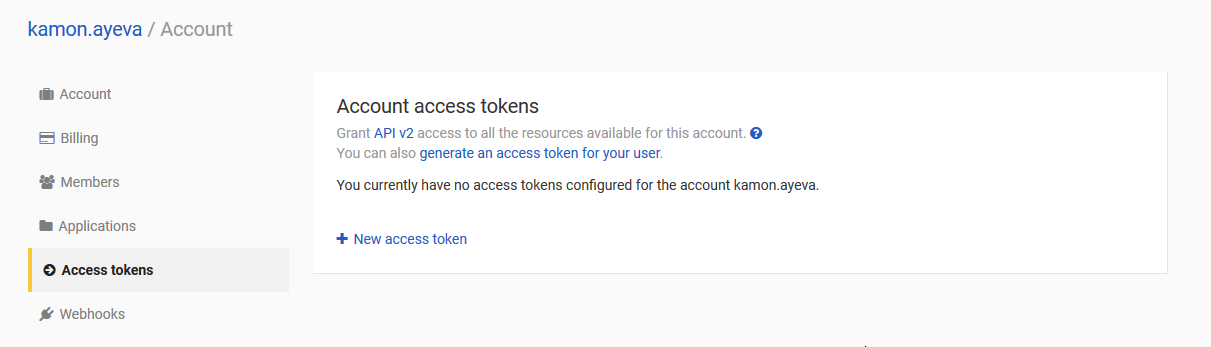
Then go to the Access tokens subpage, to create the access token.
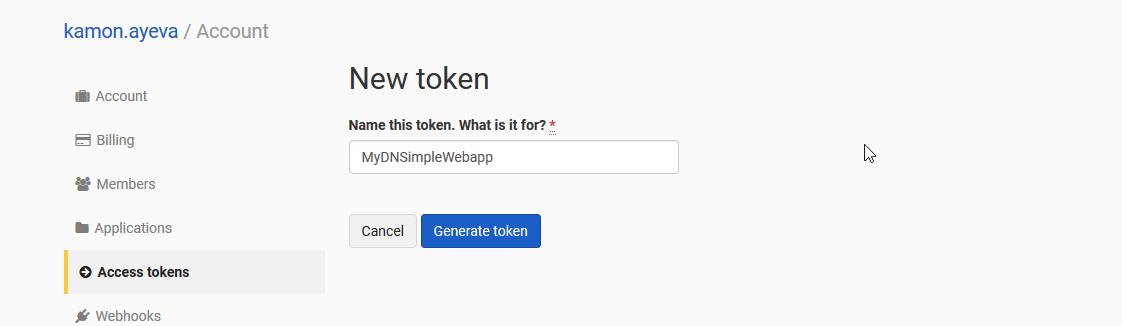
Once done, keep a copy of the generated access token in a safe place, for future use.
Next, you can authenticate with the access token (we call it YourOAuthToken for the example commands), using HTTPie:
$ http https://api.dnsimple.com/v2/whoami Authorization:'Bearer YourOAuthToken'
HTTPie allows us to pass the authorization header with the Authorization:'Bearer YourOAuthToken' part that follows the endpoint argument.
If everything goes well, the output would be similar to:
HTTP/1.1 200 OK
Cache-Control: max-age=0, private, must-revalidate
Connection: keep-alive
Content-Encoding: gzip
Content-Type: application/json; charset=utf-8
...

{
    "data": {
        "account": {
            "created_at": "2014-03-04T20:31:18Z",
            "email": "youremail@example.com",
            "id": 12345,
            "plan_identifier": "dnsimple-personal-yearly",
            "updated_at": "2017-09-29T18:11:37Z"
        },
        "user": null
    }
}
Getting the list of your domains
The following HTTP GET request will show the list of domains for the account, assuming the account identifier is '12345':
$ http https://api.dnsimple.com/v2/12345/domains Authorization:'Bearer YourOAuthToken'
You should get a result similar to the following one:
HTTP/1.1 200 OK
Cache-Control: max-age=0, private, must-revalidate
Connection: keep-alive
Content-Encoding: gzip
Content-Type: application/json; charset=utf-8
...

{
    "data": [
        {
            "account_id": 12345,
            "auto_renew": true,
            "created_at": "2014-09-12T21:30:21Z",
            "expires_on": "2018-02-13",
            ...
            "name": "mydomainexample.com",
            ...
            "unicode_name": "mydomainexample.com",
            "updated_at": "2017-05-31T16:05:56Z"
        },
        {
            "account_id": 12345,
            "auto_renew": true,
            "created_at": "2016-12-09T16:25:02Z",
            "expires_on": "2018-10-28",
            ...
            "name": "anotherdomainexample.com",
            ...
            "unicode_name": "anotherdomainexample.com",
            "updated_at": "2017-09-29T18:10:01Z"
        },
        ...
        ...
        ...
    ],
    "pagination": {
        "current_page": 1,
        "per_page": 30,
        "total_entries": 21,
        "total_pages": 1
    }
}
Easy enough, isn't it?
Other actions to try
Now of course, we could do "write operations" such as registering and creating a domain. I will show that in the next parts, using the API sandbox environment.


